
- 01 March 2022
- Apprentices &
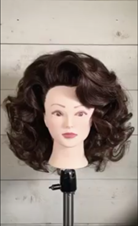
This big hair statement look will definitely help you or your client stand out from the crowd.
In this month’s how to guide we are creating a look with amazing volume. This big hair statement look will definitely help you or your client stand out from the crowd.
You can learn the skills needed to professionally reproduce this amazing look with an outstanding apprenticeship from Saks Apprenticeships, browse the exciting opportunities available right now on the vacancy pages.
What you will need to master the look:
- Volume Lifting Mousse
Hair Spray
Round Brush
Tail Comb
Pins
Heated Tongs
Hair Dryer
Soft Bristled Brush
Step 1: Getting Prepared
Add some volume lifting mousse to create the hold. Don’t hold back when it comes to looks like this product is king. It helps support the look. protect from humidity and will give a longer lasting look.

Step 2: Create Maximum Root Lift
While the hair is wet sub-divide into sections and using a brush to keep tension hold the hair up and blow dry from the root up with your hairdryer on a hot setting. Finish off with a cool shot of air on each section.

Step 3: Don’t forget the width
Use the same process on the sides but before blow drying angle the hair back slightly, instead of going straight up, to create width and volume through the sides.

Step 4: Getting all Curled Up
Taking clean sections, back comb the root and curl the mid lengths and ends using a heated tong, start at the root and work down to the ends, pin the hair into barrel curls and allow to cool.

Step 5: To the Sides
Following on from the top section follow the same process but direct the hair back away from the face, pin into place with a pin curl and allow to cool.

Step 6 And the Front
Same process again but don’t section straight up, add a slight diagonal to encourage the hair to sit back and create volume.

Step 7: Let it set then Brush it Out
After leaving to set and cool down for 10 minutes, work in sections from the bottom up over and gently brush out the curls using a soft bristle brush.

Step 8: The Finishing Tweaks
Finish the look by back combing/brushing at the root area and teasing each curl and section into place. Remember to use your mirror to check the balance of the finish. Add hairspray to hold and secure the look and protect the finished look from the elements.

For even more detailed instruction you can watch Luke's video below.
If this has helped you catch the hairdressing bug and you want to learn to be a hairdresser and start a career in this exciting and rewarding industry have a look at the apprenticeships available from Saks Apprenticeships over on the apprenticeships section of the website.